Camly - A Responsive Blogger Theme, Lets Take your blog to the next level.

This is an example of a Optin Form, you could edit this to put information about yourself.


This is an example of a Optin Form, you could edit this to put information about yourself or your site so readers know where you are coming from. Find out more...


Following are the some of the Advantages of Opt-in Form :-

  • Easy to Setup and use.
  • It Can Generate more email subscribers.
  • It’s beautiful on every screen size (try resizing your browser!)
by · No comments:

FUDCon 2016 Phnom Penh, Cambodia


I was selected for delivering a talk on WikiToLearn at the FUDCon APAC, Phnom Penh, Cambodia from 4th to 6th November, 2016.


FUDCon (Fedora Users and Developers Conference) is an important event in the world of free software that is held in different parts of the world organized by Fedora Organization. The FUDCon comprised of sessions, talks, workshops and hackfest in which project participants worked on specific initiatives. FUDCon Phnom Penh was conducted at Norton University, Phnom Penh along Barcamp ASEAN. Around 50 speakers from around the world gave talks related to entrepreneurship and open source software. I was traveling with one my friends, Abhinand N, who also got selected to deliver a talk on Mediawiki. Looked like, we were the only two undergrads who were invited to deliver talks.

It was my first international trip and pretty amazing. My itinerary was something like this : Cochin -> Kuala Lumpur -> Phnom Penh (4th November) and Phnom Penh -> Bangkok -> Cochin (9th November).

Phnom Penh looked more or less like an Indian city just with more prettier girls (:D) and no public transport. We reached Phnom Penh on 4th evening, and a tuktuk driver was waiting for us at the airport to take us to the hotel. If you're wondering what a tuktuk looks like, see this :


As soon as we reached Hotel, it was almost Dinner time. Sirko Kemter was the local organizer and all the developers decided to go to a nearby BBQ place. Remember, Abhinand is a pure vegeterian and he came to eat BBQ (:P). Anyway, the food was great, since I had never tried Lobster and Prawn. Amazing experience, it was.

At the time of dinner, I interacted with rest of the Fedora developers from India, Australia, China and USA. Kushal Das, Sayan Chowdhary were among the famous open source developers from India. It was great meeting and interacting with them.

Day 1 : FUDCon APAC, Norton University, Phnom Penh

FUDCon Day 1 was pretty amazing. We started off with Barcamp pitches followed by Fedora State of the Union talk from Brian Exelbierd, Fedora Community Action and Impact Coordinator.


The first talk I went to was Introduction to Rust Programming Language by Kanika Murarka. Kanika actively contributes to Fedora, and is an intern at Red Hat, Bangalore. She engrossed us, telling that Rust is designed to be a safe, concurrent, practical language, supporting functional paradigms and is sponsored by Mozilla.


Lunch was pretty interesting. Everyone gathered at a common lunch place with full of local khmer snacks, jackfruits, veg fried rice and non veg rice. Veg food had egg in it, so yeah! (:D) Lunch was okayish, but what made it interesting was the discussion! I had a long discussion with Sumantro Mukherjee and Parag Nemade about my project and it was great! After the discussion, we followed for the next series of talks.


Next talk, I went onto was How to globalize your software by Parag Nemade. Parag Nemade is a Senior Software Engineer at Red Hat. He is an active contributor to Fedora project, sponsor for packager group, proven packager, helps in improving Fedora packaging and testing Fedora updates. Parag introduced us to Globalization. It is a collaborative work done by internationalizing, localizing your software. He told us how important it is to globalize the code you write. Then he told what Localization is and how to add internationalization in code by showing some code examples. It was a great talk!


The following talk was by Alex Eng on Zanata, a translation platform. One of the best and interesting talk for the day. Alex presented a round up of the new features that will be available in the next release of the translation tool. I was very eager to learn more about how Zanata works, and therefore had a brief conversation with him. I was fascinated about the new editor and discussed  my GSoC project and collaborative editing would work in Zanata. Handling translations is very challenging and great thing is that, WikiToLearn is also looking for ways to implement Zanata.


The next talk was on Web Virtual Reality by Sumantro Mukherjee. The highlight of the talk was a-frame. A-frame is a web framework for building virtual reality experiences and works on almost all devices. With just few lines of code, you can turn a video into 360 degree Virtual Reality. Amazing, isn't it?


The last talk of the day was by Anwesha Das on A walk on licenses in Fedora ecosystem. She gave an overview of all the open source licenses, why it is important to use a license and what are the best practices of using a license. The take from the talk was not to use personalized licenses and even if you use it, not to name it like Buy me a beer or something similar. Overall, it was great to learn about Licenses.


The day ended with all the Indians and Ryan going to a Riverside Restaurant and having amazing food.

Day 2 : FUDCon APAC, Norton University, Phnom Penh

Day 2 started with heavy rains at Cambodia. Thanks to Sirko for providing raincoats! It was another day of interesting talks and I had my talk at 3pm.

The first talk I went to was by Noriko Mizumoto on How can you help us get Fedora to the world?. Noriko hails from Japan and is a Community Relations Specialist and Program Manager, Red Hat Asia Pacific. Noriko focused on the importance of localization. Localization of a software is very important, since non-native English speakers are much more when compared to native English speakers.She introduced how Fedora has been localized into over 80 languages. A great talk, indeed.


Following was the talk on Exploring Fedora Infrastructure by Sayan Chowdhary. Sayan Chowdhary is a Senior Software Engineer at Red Hat, Pune and has been a Python developer contributing to Fedora. Sayan talked about Fedora web projects and how can one contribute to them.


Next was the talk by Kushal Das on Testing Fedora Atomic in an automated way. I don't need to introduce him (:P). He talked about testing fedora atomic project in an automated way by using Python and Go script made by him. It went over my head mostly, since I never contributed to Fedora. Anyway, it is always amazing to listen him speaking. The way he explains a scenario, is absolutely stunning.


After the better lunch, next talk I attended was on Fedora QA by Sumantro Mukherjee. Sumantro introduced us to Fedora Quality Assurance, the workflow and how to test a package. Great talk, indeed.


Now, it was time for my talk on WikiToLearn : Bringing Academia to the Internet Era : A revolution in Knowledge Sharing. I introduced WikiToLearn to the attendees, how to contribute and gave them a hand-on session on "How to make a personalized book". I briefed on how WikiToLearn is being adapted at European Universities and making it easier for students and professors for collaborative learning. I spoke on who/how can contribute being a student, teacher, translator or hacker, how the project is having powerful impact not only in Europe but also in the world with many universities involved and also organizations like KDE, Wikimedia Foundation and the CERN, About the power of collaboration and its impact in academia with the help of WikiToLearn and also how students and professors are using it in their universities as a tool to make learning much more effective in a collaborative way. Slides for the talk can be found here.


The last talk was on Contributing to Mediawiki by Abhinand N. Abhinand is a Google Summer of Code'16 select for Mediawiki. He actively contributes to Mediawiki. He introduced attendees to Mediawiki and how can one contribute to Mediawiki by code. He briefed about Gerrit and the workflow of patch submition. It was a great talk, too.


We had a great party after the talks at Fudpub with Barcamp organizers. Free beer, yaay (:D).


This was the first time, I attended Fedora event and it was amazing to meet and interact with developers around the world. Kudos to the local organizers and KDE for sponsoring my trip. Overall, it was an amazing experience which I'm going to cherish for long.

Read More
by · No comments:

MediaWikiToLearn Hackathon + Editathon


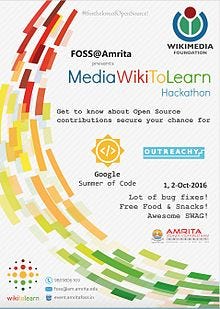
FOSS at Amrita presents you for the first time in India, MediaWikiToLearnHack-a-thon and Edit-a-thon in collaboration with Wiki To Learn andWikimedia Foundation at Amrita University, Amritapuri Campus.


Background

FOSSatAmrita, is a student community at Amrita University, Amritapuri Campus. Being one of the most active student communities on the campus, we encourage, support and mentor students to improve their technical and social skills through contributing to open source. We aim at encouraging students to embrace the free and open source approach that is fast gaining momentum. We are a community of students and mentors that support and guide each other towards making open source contributions, and towards the usage of free software. This year, FOSSatAmrita gave 10 selections in Google Summer of Code and 1 in Outreachy, that shows the potential in the students of FOSSatAmrita club.


To ensure more open source contributors, we are bringing this two day hackathon, for the very first time in the history of Amrita University, Amritapuri Campus. MediaWiki is organizing a two-day hackathon to help students understand the working of the MediaWiki and WikiToLearn community. Two days long hackathon would include every aspect — from installing the software, setting up the environment to fixing some easy bugs and submitting the patches for review. (Don’t worry if some of the words don’t make any sense now, we’re here to answer all your queries!)

The program will run from 01st-02nd October with the two parallel tracks:

MediaWiki Hackathon: Run by invited developers and existing MW contributors in the club. Expected participant count of 50, and all requests handled by the below mentioned Google Form. Participants will be given guidance and opportunity to code contribute to the Wikimedia codebase, sending in patch sets, and understanding the code review process. This would make them head start into upcoming Google Summer of Code 2017 and other internship opportunities.

WikiToLearn Edit-a-thon:Teachers and students get together to collaborate and develop open course content on en.wikitolearn.org. Teachers would participate by either editing or reviewing contents in the wiki. This will make it easy for teachers and students to have a structured method to communicate online over academic materials.
Added Benefit

Are you willing to apply for Google Summer of Code (GSoC) but don’t know how to start?

Well, that’s problem everyone faces at the onset of joining the open source communities.

Attending this workshop would give a clearer picture to anyone who’s willing to apply to the open source scholarship programs like Google Summer of Code (GSoC) and/or Outreachy but lacks direction or information. This workshop will leave you with a better understanding of how you may proceed with contributing to an organization of your choice, thus significantly boosting the probability of you getting selected! \o/\o/

Details

Date Saturday and Sunday, October 1 and 2, 2016 Time 10 AM to 8 PMVenue Ground Floor Lab, Amrita University, Amritapuri Campus Contact foss@am.amrita.edu Hashtag #MediaWikiToLearnHack Register Register here. IRC #mediawiki on FreeNode Report Photos Bug fixes and links to patches :
Facilitators
Abdeali JK
Tony Thomas
Abhinand N
Devi Krishnan
Srijan Agarwal
Registration

Fill this Google form to register yourself for the workshop. Since we have limited slots available, we’ll keep the event limited to the registered students.

Note on the registration Prerequisites: Please note that you are cloning the development master branch of mediawiki-core form gerrit.wikimedia.org, preferably over SSH. Please follow Gerrit Tutorialtopdown to complete in both the tasks, and in case of any questions, do ask in #wikimedia-dev or #mediawiki or contact the FOSS club at foss@am.amrita.edu
Hackathon Pre-requisite

To make sure all attendees are at the same phase, please ensure that you have the following setup in your machine:
Any working Linux environment, with LAMP server installed. You can find the installation steps for LAMP in Ubuntu here
Any powerful PHP IDE, PHPstorm recommended. You can find the instructions here.
An account in Wikitech, Gerrit, Wikimedia Phabricator, and Github
Try cloning and setting up Gerrit in your machine following the instructions given here
Try connecting with #wikimedia-dev on IRC freenode channel

Important: We are expecting the participants to have a clone of MediaWiki-core downloaded and installed in their machine before hand, so that we can start early with the contribution phase. You can find the detailed instructions on how to setup development environment for Mediawiki in theGerrit/Tutorial

In case you do not have any prior know-how of PHP, Version control or web applications : You are welcome to try setting up a simple registration and login web application in PHP beforehand, in your machine. You can find sample code for the same here. You will have to setup LAMP or similar stack in your machine to test the code locally.

Why Should You Attend?

Reading through the large open-source code base and contributing as code: Increasing their technical and code scripting skills, solving simple to complex real-time problems existing in Mediawiki software.
Motivated students reaching out and getting into internship opportunities like Google Summer of Code and Outreachy: Along with building a strong hold in technical stuff, internship programs like GSoC and Outreachy allow its interns to work on major problems, proposing and implementing their solution under expert mentorships. The selected students get a considerable stipend and its a major addition to the institutional record too.
Active community engagement and other opportunities The workshop would add to the technical know-how of the participants while working closely with a worldwide Wikimedia community, which is the fun part.
FAQs

What you need to know

You need to have some sort of prior experience developing stuff (web apps, mobile apps, data mungers, anything at all!). There are a variety of things you can do (CSS/JS hacks, webapps that use the API, Mobile apps, data mining) that pretty much anyone with some developer experience is bound to find something fun to do. This is a hackathon, and not a workshop.
Knowledge of Free Software License, comfortable using any Online Project hosting websites (like Github) since we would want you make the code you write for the hack freely available, online.
If you feel you might not have anything listed here, think about taking a look at these courses:
Learn PHP online with codecademy
Learn the command line with codecademy
Learn Git online with try.github
Learn bit of Python with learnpython
Go through this repo on Contributing to Open Source and see what you can make out of it.

What language can I use

Any programming language you are comfortable with and can make sense of the MediaWiki code base
Life would get easier if you have some prior programming experience in PHP since most of the MediaWiki code is written in PHP

How can I prepare for the Hackathon
Read through links in Resources, check out the Examples.
Feel free to ask questions! Contact us.

What qualifies me to come
Show us some code you have written, tell us what you know, tell us why you love hacking (and Wikipedia) in general, and you’ll get the pass :)
Please sign up here.

How to spread the word
Pass on the word to your fellow geek friends.
Use #MediaWikiToLearnHack on Twitter.
Read More
by · No comments:

Failing GSoC! A hell of an experience!

So, yeah. I failed the final evaluations of Google Summer of Code. I didn't expect it, but I think I should have added more features to my project and worked harder. To be honest, this was one hell of a summer. Working on such a project, OfflineExtension for WikiEditor, with such an awesome community WikiToLearn and such cool mentors, Gianluca Rigoletti and Irene Cortinovis, is worth millions. I couldn't pass the final evaluations, but I gained so so much that I have no hard feelings. Of course, I felt bad, but at the end, the experience is all that matters. Thanks, Google and WikiToLearn for giving me such an amazing opportunity. I would work more on my project and try to get it in the production mode, as soon as possible. Also, I will reapply for Google Summer of Code next year too with the same organization, and will definitely pass :'). And, the bad part ends here. Good news is that I'm now a core developer of WikiToLearn, and I find this opportunity to be more worthy than being a GSoCer, so this.failure eventually equals to this.success (Sorry for this, I'm learning JAVA :P ). Thanks, Riccardo and Gianluca for giving me this oppurtunity. I’ll give my best, work harder, learn and will contribute to  as much as I can. :)

Long Live WikiToLearn, Long Live KDE, Long Live Mediawiki and Long Live FOSSatAmrita! :)
Read More
by · 6 comments:

Google Summer of Code'16 Summary


This was one hell of a Summer, I was quite fortunate to work on the WikiToLearn project with my mentors Gianluca Rigoletti and Irene Cortinovis as part of the Google Summer of Code Program. I worked on adding offline support to the current WikiEditor used by WikiToLearn, and now that the program is going to over I'd like to take a moment to summarize what I've done, recall the many things learned over a plethora of successes and failures, and talk about future work to be done with the community. I have learnt so many things over a span of short three months that would definitely help me grow as a developer, all thanks to WikiToLearn and Google.

Work Summary :

So, what did I even do during the summer? Since, I have to make an extension from scratch, it was tough job but I took help from many of the extensions already made. A summary listing of my contributions is below.

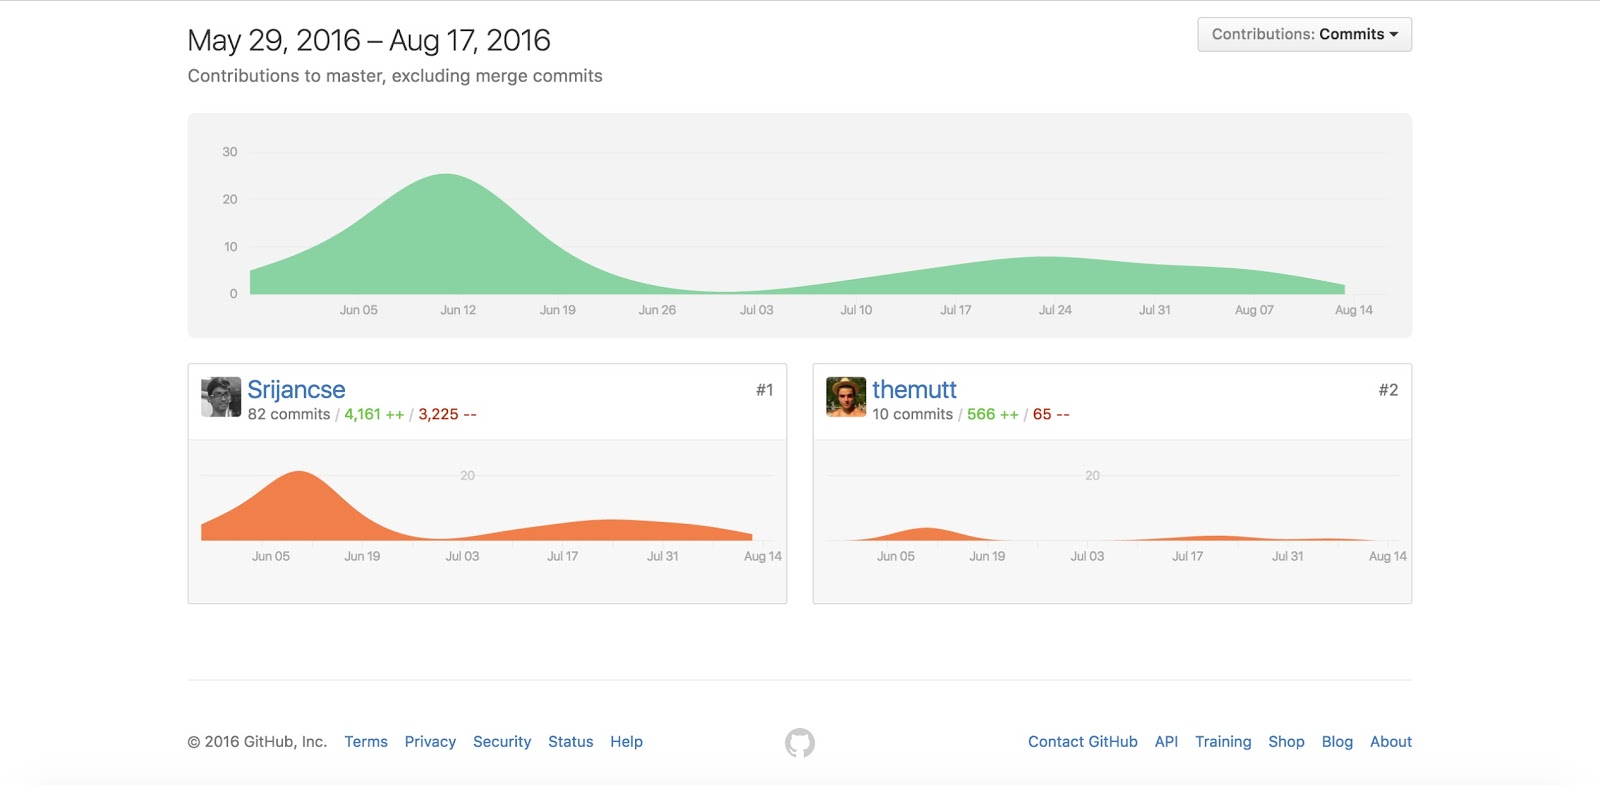
  • Over 90 commits were done during this period by me and my mentor. That's around 4722 ++ / 3290 -- lines of code. (cool, right :D) 
  • Wrote around 3 Google Summer of Code related posts. 
  • Pushing the code to organization's repository under Offline-Extension branch. 

Offline Extension for WikiEditor : 

Offline Extension is a MediaWiki extension that adds offline support to the WikiToLearn's WikiEditor. My first task was to implement the notification to the user if his/her internet connectivity goes down. I took help from hubspot offline, which successfully displays the user's internet connectivity. 
  • When Internet goes :
  •  Trying to reconnect :
  • When Internet comes back:
After the notification part was over, the next task was to parse the WikiText written by the user when he's offline. It was one of the toughest tasks as I had to learn Regular Expressions for that. There was an old parser which hasn't been updated for last 10 years (2005-06), so I had to update the parser to current wikitext format using Regular Expressions. The updated parser can be found here, it still has some issues which I have to work on later, like parsing the Tables, etc. The last task is to preview the wikitext using the parser when the user is offline. I'm working on it, and will complete it mostly in a day.

Lessons Learned from GSoC :

While I learned about JavaScript, Jquery and Regular Expressions in detail through the project, I also learned general advice that I'm sure will help me a lot in future. 

Never Assume anything to be easy : 

When I got selected for the Google Summer of Code project, I assumed it is going to be easy to implement things that I wrote in the proposal. But, NO, it was very tough to bring the project what it is now. But the best part is that, I learned hell lot of things, all thanks to my mentor and organization. 

Always ask for help if needed : 

I was lucky to have easy access to my mentors through Telegram. One thing I learned is to ask for help whenever you feel like you're stuck somewhere. My mentor always helped me whenever I was stuck and my progress was catalyzed immensely by constant availability, and I'm extremely happy that I asked for help whenever I needed it.

Future Work to be done : 

There is plethora of future work to be done for the OfflineExtension. Since, all the wikitext tags are currently not supported, I have to look for ways to parse them without making the parser heavy. Also, I have to make it more user-friendly by adding more features which I couldn't complete. 

Thanks again to my mentor Gianluca Rigoletti, co-mentor Irene Cortinovis, MediaWiki Org Admin Tony Thomas and rest of amazing WikiToLearn, KDE and MediaWiki community for helping me throughout the project and providing amazing and helpful reviews on my project. I plan to stay in touch with WikiToLearn community even after GSoC ends, so that we can kick some ass again.

Happy Coding!

Long Live WikiToLearn! Long Live KDE! Long Live MediaWiki! 

Read More
by · 1 comment:

How to make your own TOR Proxy Router with Raspberry Pi

Basic Premise of the Article:


What if you want to browse anonymously on a device maybe a laptop, mobile phone, tablet or any console device that does not have an Ethernet/LAN connection and cannot run Tor? What if you cannot install Tor or do not want to on your Work computer? What if someone wants to use Tor but doesn’t have the time or ability to run it on their computer? Then, this article is for you.


Introduction to TOR:


Tor or commonly known as the The Onion Router, allows anonymous use of internet concealing the real identity of the user. It protects the user from any traffic analysis as well as network spying. The TOR network encrypts the data into multiple layers and hides the source of origin of a web page request. As you know, every internet packet goes through 3 layers of relays before going to your destination. This makes it much harder for the server you are accessing to figure out who you are and where you are coming from.It is an excellent way to gain access to certain websites which are blocked.


Prerequisite Things:


You'll need a few things to make you own TOR Proxy Router:


  • Raspberry Pi model B+ (or B) - Ethernet is required
  • Ethernet cable
  • WiFi adapter
  • SD Card (4GB or greater) with Raspbian on it. You can either copy the Raspbian image onto it or buy a ready-made Raspbian card
  • Power supply for your Pi
  • USB Console cable (optional) - this makes it a little easier to debug the system
  • Case for your Pi (optional)
  • A SD or MicroSD card reader (optional)


Setting up Raspberry Pi :


When you buy a Raspberry Pi, it is not necessary to have been sold with a SD card. The SD card is important because this is where the Raspberry Pi keeps its Operating System and also where you will store your documents and programs.  
Even if your Raspberry Pi comes with an Operating system, it is always good to update it to the latest version. Remember, putting the Operating System in the Raspberry Pi will wipe all the data, so it is advised to have a USB drive for your documents, so that when you install a new version of the operating system, you don't have the complication of copying them off somewhere safe before reformatting the SD card.


If your Raspberry Pi did not have an SD card then the minimum size you should get is 4GB, but buy a bigger SD card if you think you will need the space. It is always advised to get a bigger size SD card.


Downloading the Image:


The operating system that will be installed onto the SD card must be downloaded from the official Raspberry Pi website. This will usually be a zip file that then extracts to a file of type .img, an image file. Whatever image file you download, the actual installation process will be the same.


There are numerous number of Operating Systems that you can install on your Raspberry Pi. If you are a beginner, you'll probably want to stick with one of the Linux distributions. Deciding you want to install Linux is not the end of the story. You now have to decide which distro of Linux you wish to install. Being an Open Source Operating System, anyone can take one of the existing distributions an add things to it or configure it in a certain way before packaging it up as another distribution option for anyone to use. This is how the most common Raspberry Pi distribution, 'Raspbian', came into existence. After downloading the .zip Raspbian file, unzip it to get the image file (.img) for writing to your SD card.


Writing the image to SD Card:

Please visit the official Raspberry Pi website, to get the procedure.


Booting and Configuring the Raspberry Pi:


Once, you have the OS installed on your SD card, it’s time to setup your Raspberry Pi to boot it up for the first time. To do this, use a tool called Raspi-Config which automatically runs when you boot your Raspberry Pi for the first time. This starts before the operating system and so you have to use the cursor keys and Enter key to navigate through the menu system.

Using the whole SD Card :
This may sound a bit weird, but by default, the Raspberry Pi only uses as much of the SD card as the operating system requires. This means that even though you might have used a larger SD card, it won't use it. To fix this so that all the space on the SD card can be used, use up / down cursor keys to select the 'expand_rootfs' menu option and hit Enter. Once you do that, a script will run and you will get the following confirmation.
Using Full Screen of the monitor:


Raspberry Pi, by default, doesn’t use the full screen of your monitor , it just appears in the middle portion of the screen. This is not true of all monitors, but if it happens, then selecting the option to Disable Overscan may fix this for you. Use the left and right cursor keys to make your selection and then hit Return. If after disabling overscan, you cannot see the left edge of the screen then see the section 'Running Raspi_Config After Booting'.


Booting into Desktop:


Raspberry Pi, by default, boots you into command line interface. So, to boot into Desktop, select the Boot_behaviour option and select ‘Yes’ and Enter.


Testing the Internet Connection :


a.) Using the Ethernet cable:


The fastest way to get your Raspberry Pi connected is to use an Ethernet patch cable and just plug it into the back of your router.As soon as you plug your Pi in, you should see the network LEDs start to glow. If that doesn’t happen, it means your router is not configured to DHCP (Dynamic Host Configuration Protocol). You can do that by going to your router settings in the computer which is already connected to it, and enabling the option which configures DHCP for your router.


b.) Setting up WiFi using the command line:

Open the terminal, and use the following commands :


  1. sudo nano /etc/network/interfaces
  2. auto lo


iface lo inet loopback
iface eth0 inet dhcp


allow-hotplug wlan0
auto wlan0

iface wlan0 inet dhcp
         wpa-ssid "your_ssid"
        wpa-psk "your_password"


You have to make changes at the last two lines, changing your_ssid and your_password to your wifi’s SSID and password respectively. After changing that Press Ctrl + x to save the file. Restart your Raspberry Pi and you would see Pi connects to your WiFi as it boots up.


To find the IP Address of your Raspberry Pi, open the terminal and type the following command:


sudo ifconfig


Next to the wlan0, you will see inet address which is your Pi’s IP address.


Installing TOR:


Now, we’ll install TOR - the onion routing software step by step. Log in to your Raspberry Pi by ethernet or wifi and open the terminal.


sudo apt-get update
sudo apt-get install tor


Then you need to edit the TOR config file by running


sudo nano /etc/tor/torrc


And write the following code to it, right below the FAQ option


Log notice file /var/log/tor/notices.log
VirtualAddrNetwork 10.192.0.0/10
AutomapHostsSuffixes .onion,.exit
AutomapHostsOnResolve 1
TransPort 9040
TransListenAddress 192.168.42.1
DNSPort 53
DNSListenAddress 192.168.42.1


We’ll now change the host access point to something, let’s call it Onion Pi for now - don't forget to set a good password, don't use the default here!

sudo nano /etc/hostapd/hostapd.conf


Now, we need to change our ip routing tables so that connections via the wifi interface (wlan0) will be routed through the tor software. Type the following to flush the old rules from the ip NAT table.

sudo iptables -F
sudo iptables -t nat -F

Type this to route all DNS (UDP port 53) from interface wlan0 to internal port 53


sudo iptables -t nat -A PREROUTING -i wlan0 -p udp --dport 53 -j REDIRECT --to-ports 53

Type this to route all TCP traffic from interface wlan0 to port 9040


sudo iptables -t nat -A PREROUTING -i wlan0 -p tcp --syn -j REDIRECT --to-ports 9040


Next you can check that the ip tables are right with
sudo iptables -t nat -L

Now, if it all went good, we’ll save it to old NAT save file using this command


sudo sh -c "iptables-save > /etc/iptables.ipv4.nat"


It will automatically get loaded when the networking is set up on reboot.


Next we'll create our log file which is very handy for debugging with


sudo touch /var/log/tor/notices.log
sudo chown debian-tor /var/log/tor/notices.log
sudo chmod 644 /var/log/tor/notices.log


You can check it with


ls -l /var/log/tor


To start the TOR service manually


sudo service tor start

To check if TOR really running


sudo service tor status

Finally, to make it start on boot


sudo update-rc.d tor enable


To test our TOR anonymizing proxy, you could just simply click on Onion Pi available in your Wi-Fi list and type the password you entered at the time of hostapd configuration file.


To check that the proxy is working, visit a website like http://www.whatsmyip.org which will display your IP address as it sees it and also the matching domain name if available. The IP address should not be from your internet provider - in fact, if you reload the page it should change!


References :


Read More